JTAG Tag Generator Help
In the Name of God
In this tutorial, we are focusing at the JTAG training.
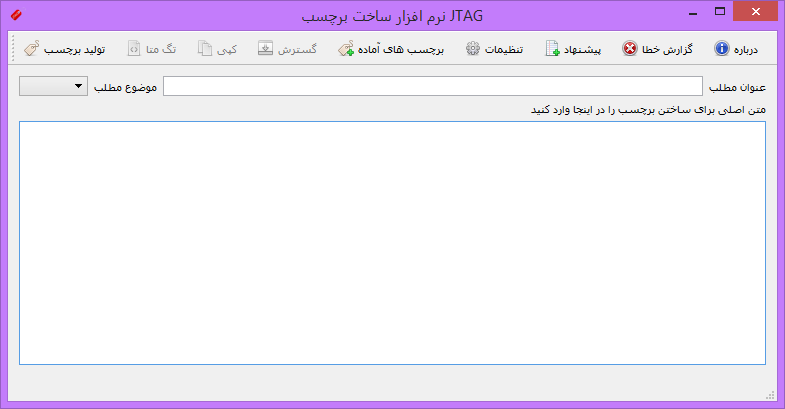
After downloading and installing the software, when running the software you will encounter a page similar to the one below:
In JTAG software, you can use two mechanisms in the software to build labels. The first mechanism that came from the early versions of the software is the use of the words in your article, in which you give your text content to the software, and JTAG software, based on the settings you have applied, translate words from the inside of the article and turns into tags.
The second mechanism of the software, which has been added to the program since version 3.5.2, is that you create one or more tables of different topics in software, and in each of these topics, you put the tags you want and these tags are stored in the program's database, and when you create your tags, you can apply your pre-made tags to the final tags by choosing the settings you are looking for.
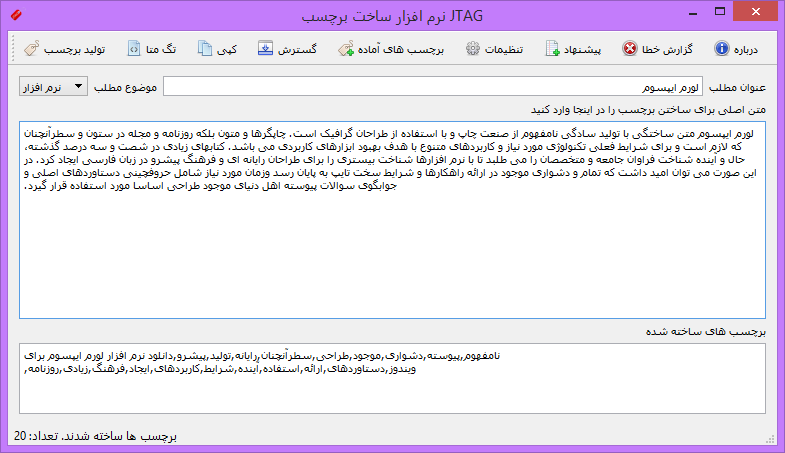
You can either use one of these two mechanisms or use both mechanisms at the same time. In the following, we use both mechanisms at the same time. We will first enter the title of article and then select the subject from the available topics. Now copy your text to the top of the box above and click on the label above button on the top bar. In the image below, after clicking on the tag generation button, the software created the tags according to the settings as well as pre-made tags:
One of the features of the JTAG software is the insertion of tags inside the meta tag. With this option, you can easily place the tags that you created in the meta tag, and you do not need to manually write this tag. You can see the tags in the meta tag after creating the tags by clicking the meta tag from the top of the software bar:
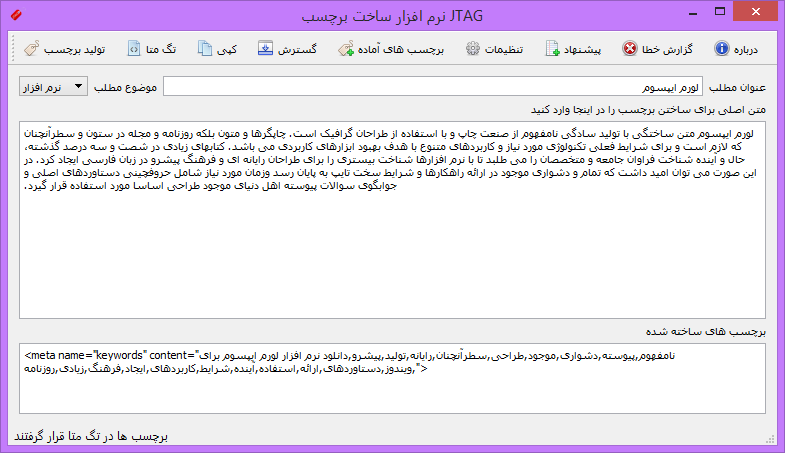
When tags are created, you can put the tags on the clipboard by clicking the copy button on the top of the software bar. Also, by clicking the expand button, you can hide the tags box to allocate all the software space to the original text box. On the main screen of the software, you can customize the size of the text boxes by placing the mouse between the two text boxes and holding the left click and pushing the mouse up and down. Click on the pre-made tags button in the upper bar of the software to set pre-made labels. By clicking on this button you will see a window like the image below:
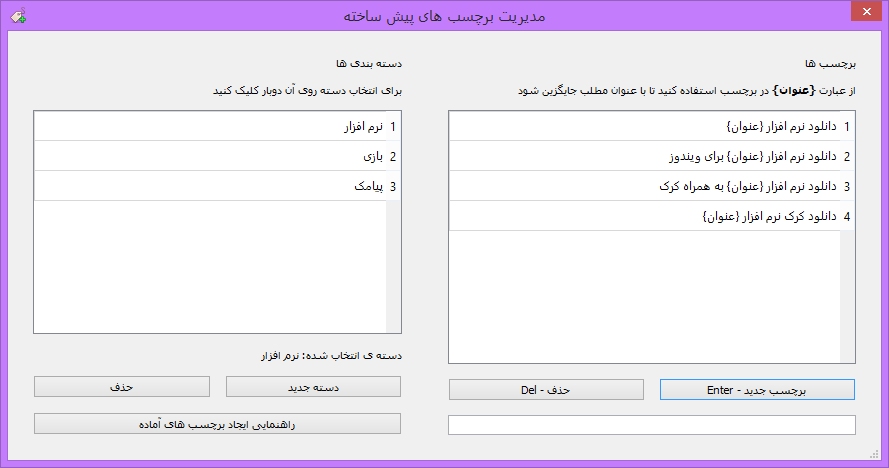
In this section, you can specify which tags are to be included, and which labels are included in each of these categories. By default, the software contains 3 categories as shown in the image above. These three categories are also editable or can be deleted by you. You can add a new category by clicking on the new category button. These categories are the same topics as your content on the main page in the drop-down list. To delete the category you want, double-click it to select it and then click the delete button that is located on the left. Please note that you must double-click on it to select a category.
To create new ready tags, double-click on the category you want to select. After that, the ready labels in this category are displayed on the right. Now, to add new tags, click on the text box at the bottom right and enter your desired tag.
{عنوان} anywhere from the tag, the software automatically replaces the title with it.
After writing the phrase, click the button new tag - Enter to add the new tag to the list. You can also remove the tags by selecting a few items in the table on the right and clicking the Delete - Del button. The tags in this section are stored in the program's database, which you can see or change the location of the database through the settings section. We will continue to examine this issue.
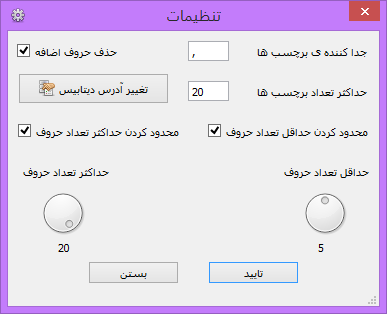
The character written in the separator box will be placed between the tags created. By default, this value is ",". If the option to remove extra letters is ticked, terms like: from, to, and, and etc. are deleted from the tags. By setting the maximum number of tags, you can specify the number of tags to be generated. This number is adjustable from 0 to 1000. 0 means unlimited. It is recommended that you set this value to 20. By clicking the button to change the address of the database, you will be presented with a box representing the current address of the database, and you can also change the address of the database to your desired location. Another feature of this section is to set the scope of the letters to build the label. In this way, you can specify how many and a maximum number of letters a tag can be. By deactivating at least the letters, this number is set to zero and practically no minimum is taken into account. But by disabling the maximum letters, this number is placed on the number 20 and the software does not normally accept words over 20 letters as a tag in normal mode.
You can submit your suggestions on this software to Pure Soft by using the feedback option on the top bar of the software. We will use your suggestions to improve our services and software. Also, if you see an error in our software, you can place the error report in the upper bar of the software about the error that happened to you. The about is located on the top of the software where you can view the information and software version and check for the new version. You see this section in the image below:
